Server Management
Server Preparation
Java Runtime Environment
Apache Tomcat requires a Java Runtime Environment (JRE) as a prerequisite for installation. If Java is not already installed on your server, follow the instructions below to install JDK 11.
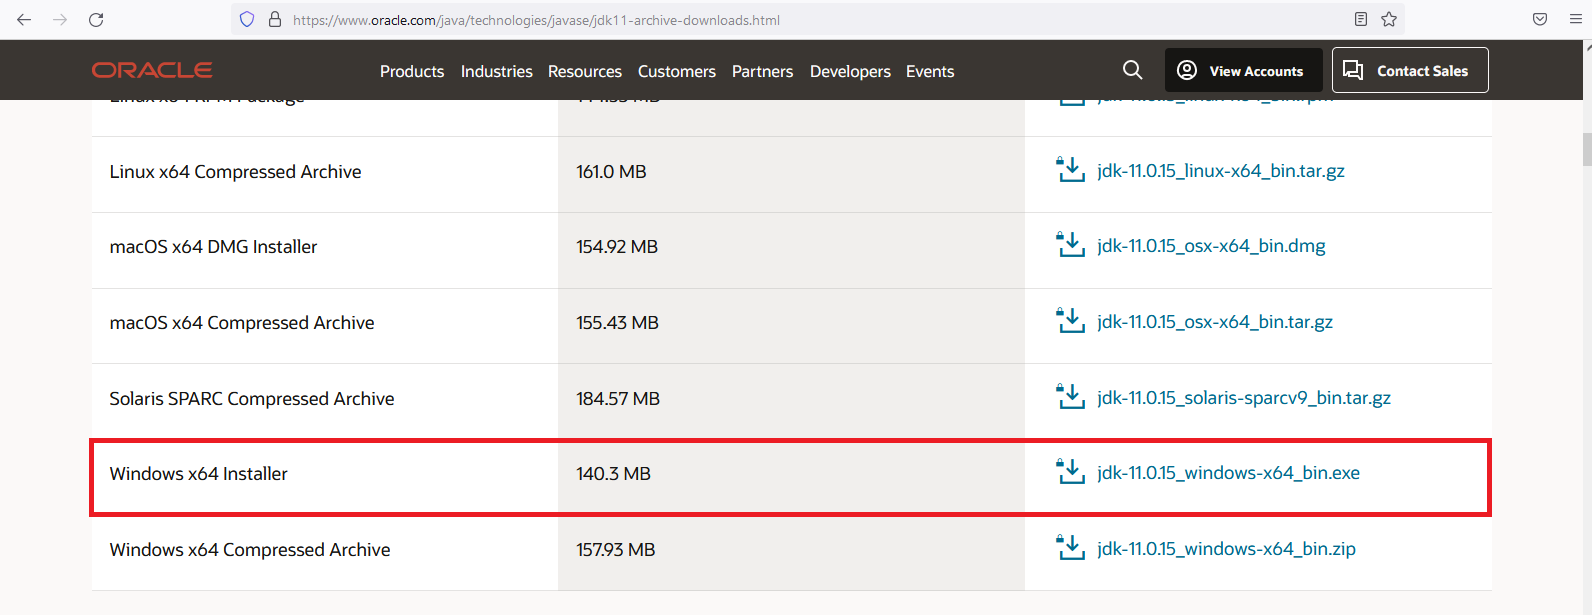
Visit the official Oracle JDK 11 Archive Downloads Page to download the JDK 11 installer.
Launch the downloaded
.exefile to begin the installation process.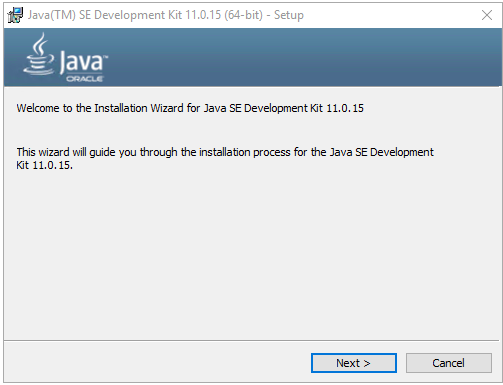
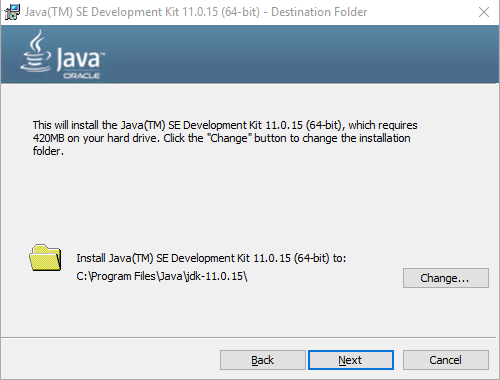
Choose the desired installation directory for Java, or click Next to use the default folder.
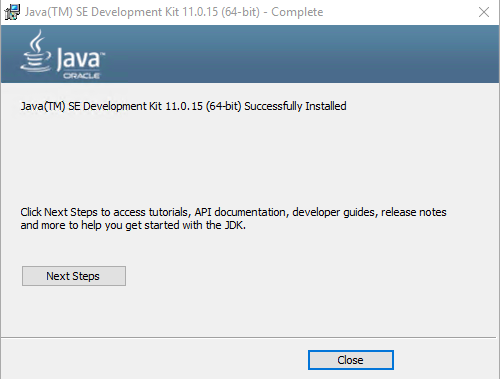
Proceed through the installation steps and close the wizard upon completion.
To verify that Java has been installed successfully, check Java Version by open windows command prompt and run
java --version. You should see output similar to the following: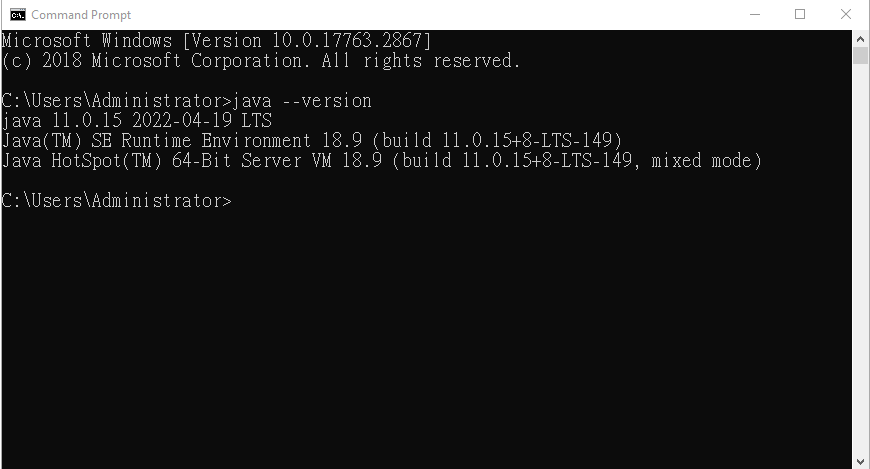
Apache Tomcat Server
This guide provides step-by-step instructions to install and configure Apache Tomcat Server for deploying the Ditto Hybrid Platform Web Client.
Apache Tomcat Installation
Visit the official Apache Tomcat 9.0.63 Download Page and download the installer file.

Execute the downloaded
.exefile to start the installation process.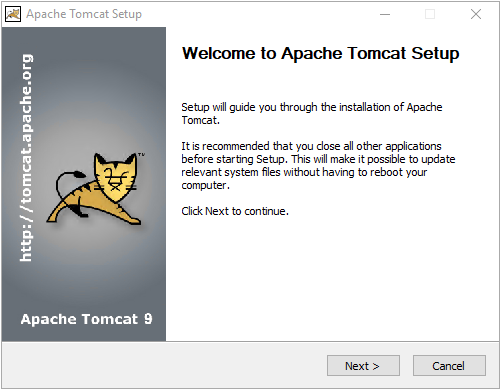
Read and accept the license agreement, then click
Nextto continue.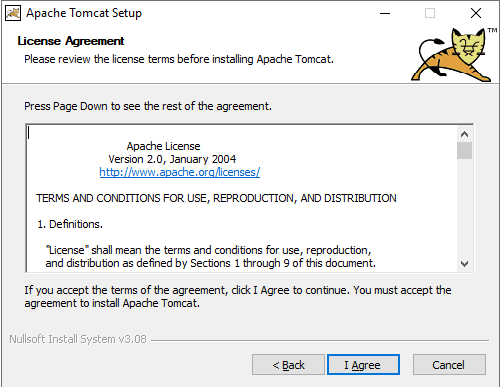
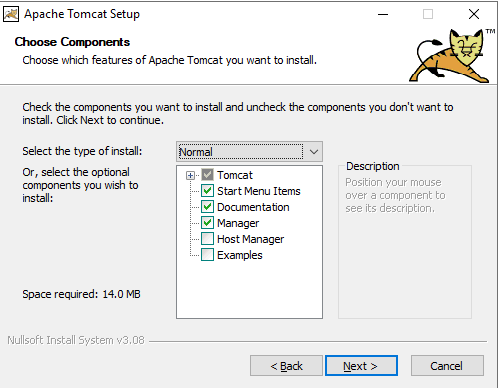
Opt for the default Normal installation type or select additional components if required.
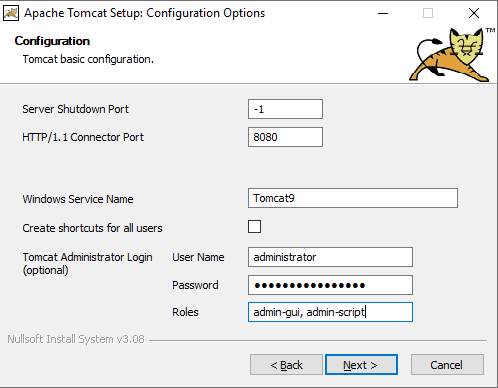
Provide a username, password, and assign roles for Tomcat users (Optional). Leave other fields as default if not required.
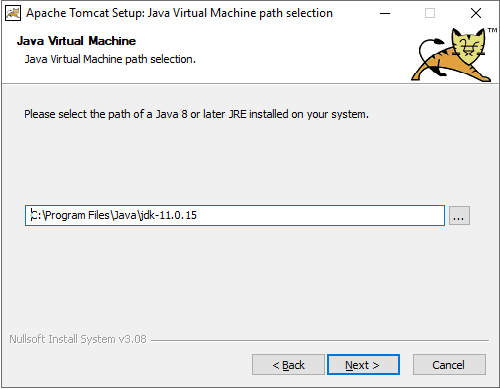
Select the path to the Java Runtime Environment (JRE) that was installed earlier.
Define the installation directory for Apache Tomcat. The default path is:
C:\Program Files\Apache Software Foundation\Tomcat 9.0
Proceed with the installation process and close the wizard once completed.
Check Windows Services to ensure that Apache Tomcat is installed. If the service is not running, click Start to activate it.

Open a browser and navigate to:
http://localhost:8080If the Tomcat welcome page (shown below) is displayed, the installation was successful.

Server Configuration
Apache Tomcat Server Configuration
This guide provides detailed instructions for configuring custom settings in Apache Tomcat to enable the running of multiple instances by modifying the server.xml file.
Tomcat Port Configuration
To run multiple instances of Apache Tomcat, you need to configure a custom AppBase folder and HTTP Connector Port. Follow the steps below:
Navigate to the Tomcat installation directory, open the
conffolder, and locate theserver.xmlfile.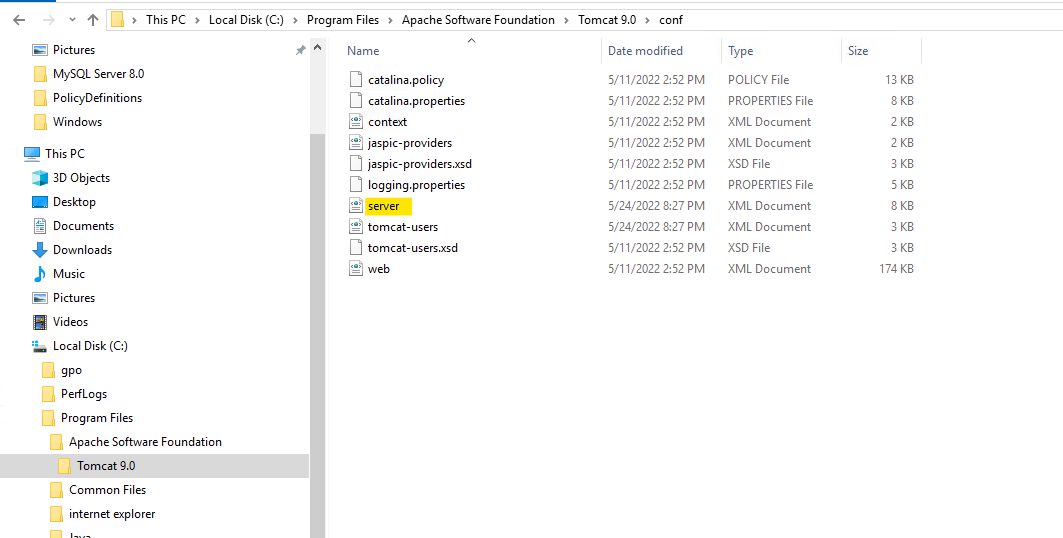
Open the
server.xmlfile with a text editor and search for the closing</Service>tag.Insert the following code block below the existing
<Service>configuration to define a new AppBase and Connector Port:<Service name="yourServiceName"> <Connector port="yourCustomPort" maxHttpHeaderSize="7192" maxThreads="150" minSpareThreads="25" maxSpareThreads="75" enableLookups="false" redirectPort="yourCustomPort" acceptCount="100" connectionTimeout="20000" disableUploadTimeout="true" /> <Connector port="yourCustomPort" enableLookups="false" redirectPort="yourCustomPort" protocol="AJP/1.3" /> <Engine name="yourEngineName" defaultHost="localhost"> <Realm className="org.apache.catalina.realm.UserDatabaseRealm" resourceName="UserDatabase"/> <Host name="localhost" appBase="yourAppBaseName" unpackWARs="true" autoDeploy="true" xmlValidation="false" xmlNamespaceAware="false"> </Host> </Engine> </Service>
Replace the placeholders (
yourServiceName,yourCustomPort,yourEngineName, andyourAppBaseName) with appropriate values based on your requirements.Example Parameters:
yourServiceName: Unique name for the service (e.g., MyService).yourCustomPort: The port number to be used for the HTTP connector (e.g., 8081, 8082).yourAppBaseName: The directory name for application deployment (e.g., webapps_instance1).
The example below illustrates a typical custom port configuration:

Restart the Tomcat server after making changes to apply the new configuration.
Optional: Java Heap Memory Configuration
When deploying applications that involve large-scale machine learning models or data processing tasks, it is essential to allocate sufficient Java Heap Memory to avoid performance degradation or OutOfMemoryError. You can configure the Java heap size by modifying the setenv script in the Tomcat installation.
Follow the steps below to adjust the memory settings:
Navigate to the
bindirectory of your Tomcat installation.Create a new file named
setenv.bat(for Windows) orsetenv.sh(for Unix/Linux) if it does not already exist.Note
On Unix/Linux systems, ensure the script has executable permissions by running
chmod +x setenv.sh.Add the following configuration to the file, adjusting values according to your system’s RAM. It is recommended to allocate 50–75% of the total physical memory to the heap size when running memory-intensive applications:
For Windows (
setenv.bat):set "JAVA_OPTS=-Xms4G -Xmx6G"
For Unix/Linux (
setenv.sh):export JAVA_OPTS="-Xms4G -Xmx6G"
Replace
-Xms(initial heap size) and-Xmx(maximum heap size) values according to your hardware capacity. For instance, if your machine has 8 GB of RAM, you may allocate 4 GB as the initial size and 6 GB as the maximum size.Restart Tomcat to apply the updated memory settings.
Note
Proper heap size configuration ensures smoother runtime performance, especially when your applications involve large trained models, high-volume transaction data, or heavy concurrent usage.
Alternatively, for Windows GUI users, you can configure the Java heap memory via the
Tomcat9w.exeutility provided with the Tomcat installation:Open the
bindirectory inside your Tomcat installation folder.Locate and double-click
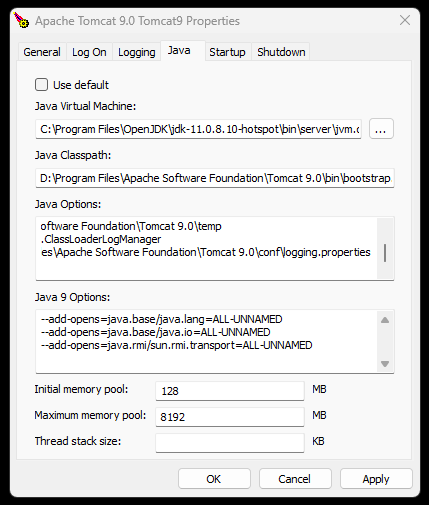
Tomcat9w.exe. This utility is typically named based on the Tomcat service name, such asTomcat9w.exeorTomcat9w.exe //ES//<ServiceName>.In the Tomcat Properties window, go to the Java tab.
In the Maximum memory pool field, specify the maximum heap size (e.g.,
6144for 6 GB).In the Initial memory pool field, specify the initial heap size (e.g.,
4096for 4 GB).Click Apply, then OK to save the changes.
Restart the Tomcat service for the settings to take effect.
Tip
This method is particularly useful for system administrators who prefer a graphical interface and ensures that memory settings persist with the Windows service.
MySQL Configuration
This guide provides detailed instructions for configuring the MySQL database connection to ensure seamless integration with the application.
MySQL Connection Configuration
Navigate to the directory where Apache Tomcat is installed and execute the
configuration.exefile.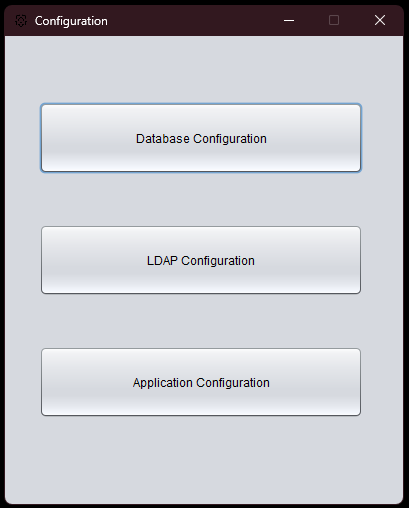
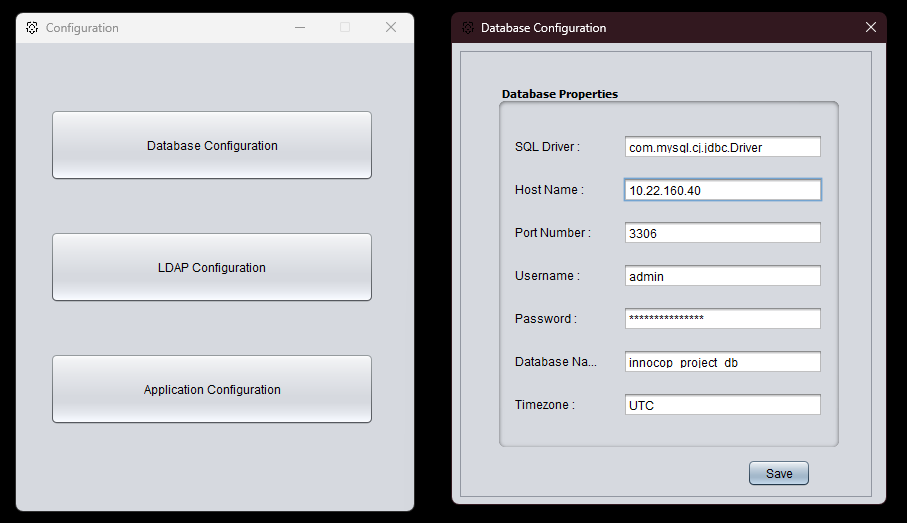
Click on the Database Configuration option to define and adjust the required parameters for connecting to the MySQL database.
Configuration Parameters and Details
Parameter
Description
Default
SQL Driver
Specifies the name of the MySQL connector driver used to establish the connection.
com.mysql.cj.jdbc.Driver
Host Name
The IP address or hostname of the MySQL server that hosts the project database.
localhost
Port Number
The port number on which the MySQL server is running.
3306
Username
The username of the MySQL account with access permissions for the specified database.
Password
The password associated with the specified MySQL user account.
Database Name
The name of the database containing project-related information for the Ditto Hybrid Platform
innocop_project_db
Timezone
Specifies the timezone of the MySQL server to ensure consistency in time-related operations.
UTC
MySQL Replication Configuration
This guide provides detailed instructions for enabling and configuring replication in MySQL databases. Follow the steps below to enable replication in MySQL databases :
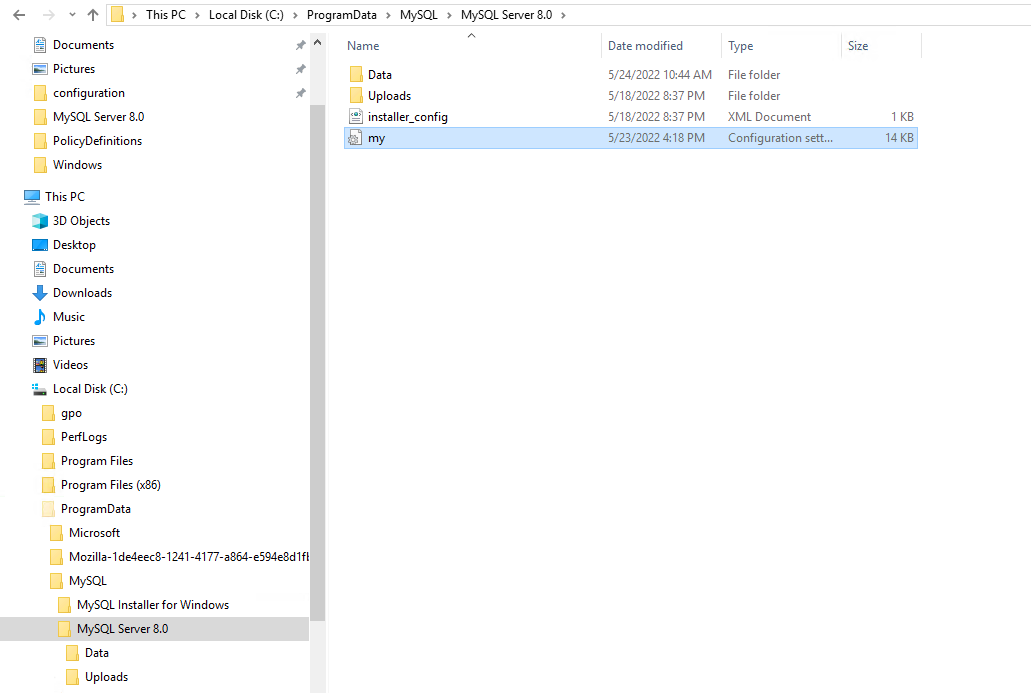
Locate and edit the MySQL configuration file. The default path for the configuration file is:
C:\ProgramData\MySQL\MySQL Server 8.0Add the following section to enable replication:
[mysqld]
server-id = 1
log_bin  = C:\ProgramData\MySQL\MySQL Server 8.0\mysql-bin.log
expire_logs_days = 10
max_binlog_size = 100M
binlog-format = row
After saving the changes to the configuration file, restart the MySQL server for the changes to take effect.
Ensure that the MySQL user account used for replication has the necessary privileges. Execute the following commands in the MySQL client:
CREATE USER '<YOUR_USER>'@'<YOUR_HOST>' IDENTIFIED BY '<YOUR_PASSWORD>';
GRANT REPLICATION SLAVE, REPLICATION CLIENT ON *.* TO '<YOUR_USER>'@'<YOUR_HOST>';
GRANT ALL PRIVILEGES ON `<INSERT_YOUR_DB_NAME>`.* TO '<YOUR_USER>'@'<YOUR_HOST>';
FLUSH PRIVILEGES;
Important
The replication user must have both
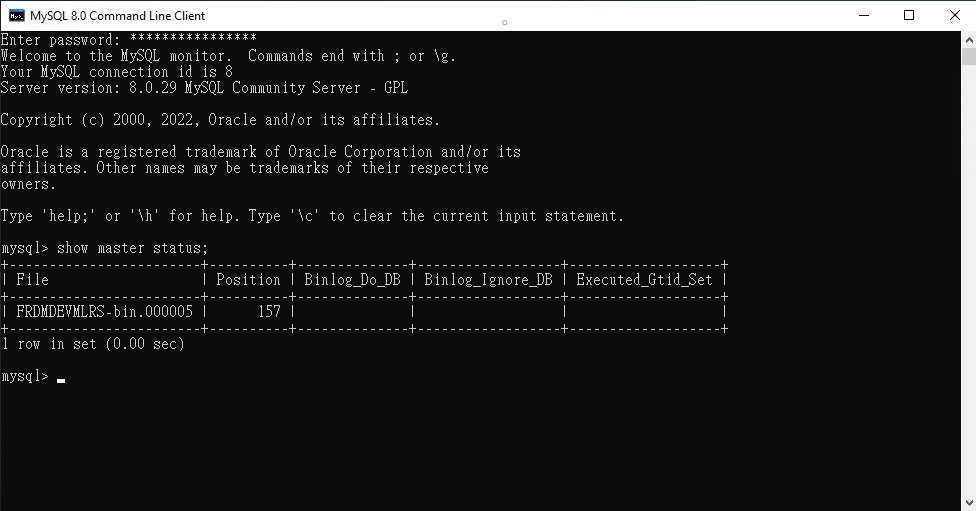
REPLICATION SLAVEandREPLICATION CLIENTprivileges to function correctly.Execute the following command in the MySQL client to confirm that replication is enabled:
SHOW MASTER STATUS;
The output should resemble the following example:
Optional: Advanced MySQL Configuration for Large-Scale Models
When working with large machine learning models or applications that involve long-running transactions, large data payloads, or replication, it is important to optimize the MySQL server settings to ensure stability and performance. The following configuration parameters are recommended for such workloads.
Open your MySQL configuration file (typically located at
C:\ProgramData\MySQL\MySQL Server 8.0\my.inion Windows or/etc/mysql/my.cnfon Linux).Update or add the following parameters under the
[mysqld]section:[mysqld] # Increase maximum allowed packet size (useful for large model parameters or serialized payloads) max_allowed_packet = 256M # Extend timeouts to prevent disconnection during long training or data processing sessions connect_timeout = 90 net_read_timeout = 600 net_write_timeout = 600 wait_timeout = 604800 interactive_timeout = 604800 # Increase binary log event size for replication (when applicable) binlog_row_event_max_size = 8M # Optional: Increase InnoDB buffer pool size to improve performance with large datasets innodb_buffer_pool_size = 1G # Optional: Enable slow query logging for performance diagnostics slow_query_log = 1 long_query_time = 2 slow_query_log_file = mysql-slow.log
Important
After applying these changes, restart the MySQL server for the new settings to take effect.
Recommended Parameter Values:
Parameter
Recommended Value
Purpose
max_allowed_packet
256M
Supports larger data transfers such as serialized models or large batch inserts.
connect_timeout
90
Defines how long the server waits for a connection packet before closing the connection.
wait_timeout / interactive_timeout
604800
Prevents timeout during long-running training or processing.
net_read_timeout / net_write_timeout
600
Improves reliability of read/write operations on large transactions.
binlog_row_event_max_size
8M
Avoids truncation of large rows in replication scenarios.
innodb_buffer_pool_size
1G (adjustable)
Improves performance when working with large datasets.
slow_query_log
1
Enables logging of slow queries for monitoring and optimization.
long_query_time
2
Logs queries taking more than 2 seconds.
Tip
Dynamic Tuning Guidance:
For systems with >8 GB of RAM, consider setting
innodb_buffer_pool_sizeto approximately 60-70% of total available memory if MySQL is running on a dedicated server.Adjust
max_allowed_packethigher (e.g.,512M) if serialized models or blobs exceed 256 MB.The
connect_timeoutvalue should be increased from the default (usually 10 seconds) to avoid failed connections under high latency or I/O pressure.Monitor the MySQL error log to ensure values like
max_allowed_packetare not being exceeded during production use.
Note
These configurations are especially recommended when the application relies on loading or persisting large ML models, dataset snapshots, or during real-time synchronization with external systems.
LDAP Configuration
This guide outlines the steps and parameters required to configure the LDAP (Lightweight Directory Access Protocol) connection for seamless integration with Active Directory.
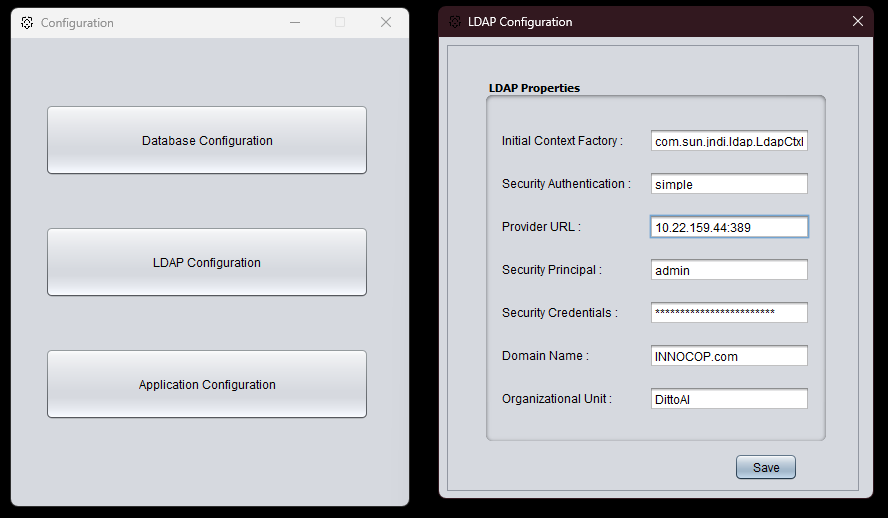
LDAP Connection Configuration
Navigate to the directory where Apache Tomcat is installed and execute the
configuration.exefile.Open the LDAP Configuration section to define the necessary details for establishing a connection to the Active Directory.
Configuration Parameters and Details
Parameter
Description
Default
Initial Context Factory
Specifies the fully qualified class name of the factory class responsible for creating the initial context for LDAP operations.
com.sun.jndi.ldap.LdapCtxFactory
Security Authentication
Defines the security level for the connection. Acceptable values include: none, simple, strong
simple
Provider URL
Specifies the URL of the LDAP server, including its IP address and port number. The format is:
LDAP_IP:LDAP_PORT.xxx.xxx.xxx.xxx:389
Security Principal
Indicates the User Principal Name (UPN) of the LDAP user account used for authentication.
(No Default Value)
Security Credentials
Represents the password associated with the LDAP user account specified in the Security Principal field.
(No Default Value)
Domain Name
Defines the name of the domain controller that manages the Active Directory.
INNOCOP.com
Organizational Unit
Specifies the name of the container (organizational unit) in the LDAP server that holds the user groups. Groups within this unit will be mapped as external roles in the application.
DittoAI
Application Configuration
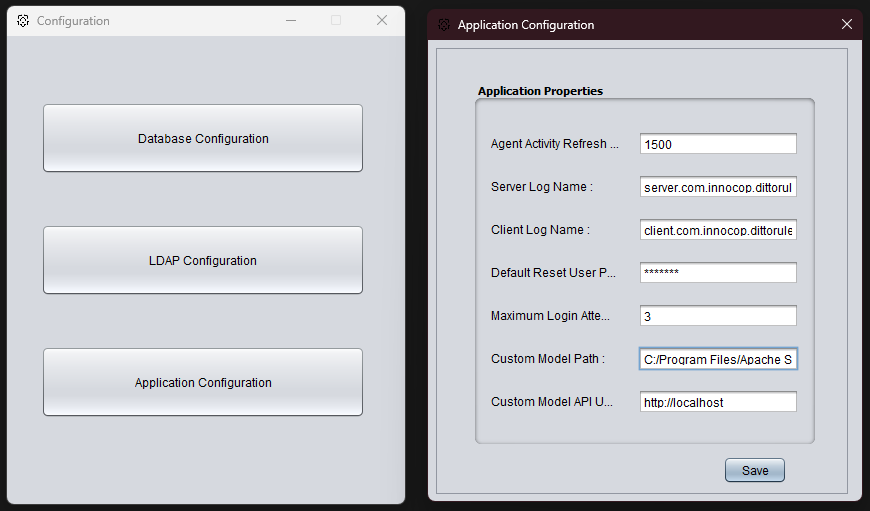
This section provides instructions for configuring the Ditto Hybrid Platform application to ensure optimal performance and usability. Follow the steps below to configure the required parameters.
Configuration Steps
Navigate to the directory where Apache Tomcat is installed and execute the
configuration.exefile.Open the Application Configuration section to define and adjust the necessary settings. This step is critical to align the application’s functionality with system requirements.
Configuration Parameters and Details
Parameter
Description
Default
Agent Activity Refresh Time
Specifies the interval (in milliseconds) for refreshing the agent activity monitoring page. This ensures real-time updates for monitoring agent performance.
1500
Server Log File Name
Defines the file name used for storing server log entries. These logs provide details about backend operations and system events.
server.com.innocop.dittorulebased.client.web.log
Client Log File Name
Defines the file name used for storing client log entries. These logs capture details about user activities and interactions within the application.
client.com.innocop.dittorulebased.client.web.log
Default Reset User Password
Specifies the default password assigned when resetting a user account or recovering an inactive account. Users are required to update their password at first login.
(No Default Value)
Maximum Login Attempt
Sets the maximum number of consecutive failed login attempts permitted before a user account is automatically locked for security purposes.
3
Custom Model Path
Indicates the file path where the custom model is stored. This is essential for integrating custom model-based functionalities into the application. Leave this empty to use Default destination directory inside Tomcat, or change it to any folder that you wish.
(Leave empty for Default Value)
Custom Model API URL
Specifies the URL (including its custom port, if any) for the Custom Model Handler API, which is utilized for handling and processing custom models.
Deploying Django on Windows Server with Apache HTTPD
This documentation outlines how to deploy a Django application on a production environment running Windows Server with Apache HTTPD and mod_wsgi. If you encounter errors while installing Ditto Django Server by executable file provided, follow these steps to manually set up the required tools and configure the server to serve your Django application effectively.
Prerequisites
Before starting, ensure the following prerequisites are met:
Operating System: Windows environment.
Python: Version 3.12.3 or later.
Apache HTTP Server: Latest stable version.
C++ Build Tools: Required for compiling Python packages and mod_wsgi.
Django Application: Ready to deploy, with static files collected.
Step 1: Install Apache HTTP Server
Download Apache HTTPD binaries for Windows from the Apache Lounge.
Extract the ZIP file to
C:\Apache24(or a directory of your choice).Configure Apache:
Open
C:\Apache24\conf\httpd.confand update theServerRootandDocumentRootpaths to match your installation directory.Locate the following line in the
httpd.conffile and uncomment it to includehttpd-vhosts.confas the configuration file. Remove the # at the beginning of the line to enable the inclusion.#Include conf/extra/httpd-vhosts.conf
To install Apache as a service, open the Command Prompt with Administrator privileges and execute the necessary command:
cd C:\Apache24\bin
httpd.exe -k install
Start the Apache service:
httpd.exe -k start
Verify the installation by visiting
http://localhostin a web browser.
Step 2: Install Python
Download the latest Python version for Windows from the official Python website.
Install Python:
During installation, check the box for Add Python to PATH.
Select Customize Installation and ensure options like pip, tcl/tk, and venv are selected.
Verify the installation:
python --version
pip --version
Step 3: Install C++ Build Tools
Download Microsoft Build Tools for Visual Studio from the Microsoft website.
Run the installer and select the C++ build tools workload.
In the right-hand pane, ensure the following components are selected:
MSVC (Microsoft C++ Compiler) v143 - VS 2022 C++ x64/x86 build tools
Windows 11 SDK
C++ CMake tools for Windows
C++ ATL for x86 and x64 (Optional but recommended for additional compatibility).
Click Install and wait for the installation to complete.
Step 4: Configure System Environment Variables
Open System Properties:
Right-click on This PC or My Computer, then select Properties.
Click on Advanced system settings.
In the System Properties dialog box, click the Environment Variables button.
Add the following paths to the System PATH variable:
Path to Python installation (e.g.,
C:\Python39\andC:\Python39\Scripts\).Path to Apache installation (e.g.,
C:\Apache24\bin\).Path to C++ Build Tools (e.g.,
C:\Program Files (x86)\Microsoft Visual Studio\2022\BuildTools\VC\Tools\MSVC\<version>\bin\Hostx64\x64).
Apply the changes and restart your Command Prompt or system to reflect the updates.
Step 5: Install and Configure mod_wsgi
Install mod_wsgi
Open Command Prompt as Administrator.
Install mod_wsgi:
pip install mod_wsgi
Troubleshooting mod_wsgi Installation
If the mod_wsgi installation fails, check the following:
Ensure the C++ Build Tools are installed with the required components (see Step 3).
Ensure all required paths (Python, Apache, and C++ Build Tools) are added to the system PATH.
Reinstall mod_wsgi after verifying the above:
pip install --force-reinstall mod_wsgi
Step 6: Prepare the Django Application
Navigate to your project directory inside Apache htdocs:
cd C:\path\to\your\htdocs\dittoproject
Deploy Ditto Django API application source code to project directory
Install project dependencies:
pip install django djangorestframework
pip install -r requirements.txt
Collect static files:
python manage.py collectstatic
Apply database migrations:
python manage.py migrate
Step 7: Configure Apache to Serve the Django Application
Ensure your Django project has a WSGI file (e.g.,
ditto/wsgi.py):import os import sys from pathlib import Path BASE_DIR = Path(__file__).resolve().parent.parent # Add project and Python's library paths dynamically sys.path.insert(0, str(BASE_DIR)) sys.path.insert(0, str(BASE_DIR / 'Lib' / 'site-packages')) from django.core.wsgi import get_wsgi_application os.environ.setdefault('DJANGO_SETTINGS_MODULE', 'ditto.settings') application = get_wsgi_application()
Configure Apache:
Open the Command Prompt and generate the configuration snippet using the appropriate command:
mod_wsgi-express module-config
Replace the
LoadFileandLoadModuledirectives in the configuration below with the output generated earlierOpen
C:\Apache24\conf\extra\httpd-vhosts.confand add the following configuration. Be sure to replace the document root and other paths with the appropriate directory for your project :<VirtualHost *:80> ServerName localhost DocumentRoot "C:\Apache24\htdocs" LoadFile "C:/Users/user-name/AppData/Local/Programs/Python/Python312/python312.dll" LoadModule wsgi_module "C:/Users/user-name/AppData/Local/Programs/Python/Python312/Lib/site-packages/mod_wsgi/server/mod_wsgi.cp312-win_amd64.pyd" WSGIScriptAlias /api/django "C:\Apache24\htdocs\dittoproject\ditto\wsgi.py" <Directory "C:\Apache24\htdocs\dittoproject"> <Files wsgi.py> Require all granted </Files> </Directory> Alias /static "C:\Apache24\htdocs\dittoproject\static" <Directory "C:\Apache24\htdocs\dittoproject\static"> Require all granted </Directory> ErrorLog "logs/django-error.log" CustomLog "logs/django-access.log" common </VirtualHost>
Save the file and restart Apache:
httpd.exe -k restart
Step 8: Test and Troubleshoot
Verify the deployment:
Open a browser and navigate to
http://localhost/api/django/evaluateto see your Django application.
Check Apache logs for errors:
Error log:
C:\Apache24\logs\django-error.logAccess log:
C:\Apache24\logs\django-access.log
Update the
ALLOWED_HOSTSsetting in your Djangosettings.pyfile:ALLOWED_HOSTS = ['localhost', '127.0.0.1']
Step 9: Secure the Application
Configure HTTPS (optional):
Set up an SSL certificate using tools like Certbot or purchase a commercial SSL certificate.
Limit access to sensitive directories:
In
httpd-vhosts.conf, apply proper restrictions to protect your Django project directory.
By following this guide, you can successfully deploy a Django application on a Windows Server using Apache HTTPD. For production environments, ensure security best practices are implemented, including HTTPS, proper file permissions, and environment variable management.