MySQL Installation Guide
This section will describe quick guide to installing MySQL on Windows Server. MySQL is available for Microsoft Windows 64-bit operating systems only. Further information about MySQL can be found at MySQL Documentation.
Important
MySQL 8.0 Server requires the Microsoft Visual C++ 2019 Redistributable Package to run on Windows platforms. Users should make sure the package has been installed on the system before installing the server. The package is available at the Microsoft Download Center. Additionally, MySQL debug binaries require Visual Studio 2019 to be installed.
Installation on Windows Server
Generally, you should install MySQL on Windows using an account that has administrator rights. Otherwise, you may encounter problems with certain operations such as editing the PATH environment variable or accessing the Service Control Manager. When installed, MySQL does not need to be executed using a user with Administrator privileges.
Using MySQL Installer Method
The simplest and recommended method is to download MySQL Installer (for Windows) and let it install and configure a specific version of MySQL Server as follows:
Execute MySQL installer file
Determine the setup type to use for the initial installation of MySQL products.
Developer Default: Provides a setup type that includes the selected version of MySQL Server and other MySQL tools related to MySQL development, such as MySQL Workbench.Server Only: Provides a setup for the selected version of MySQL Server without other products.Custom: Enables you to select any version of MySQL Server and other MySQL products.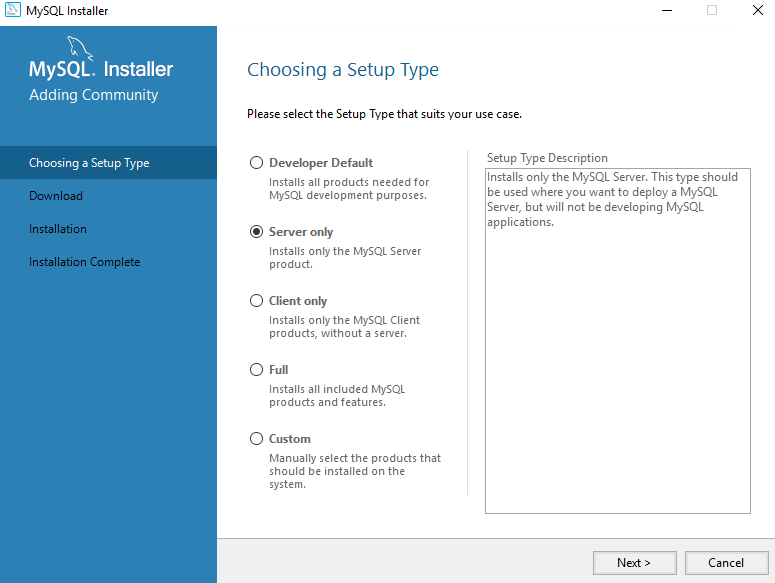
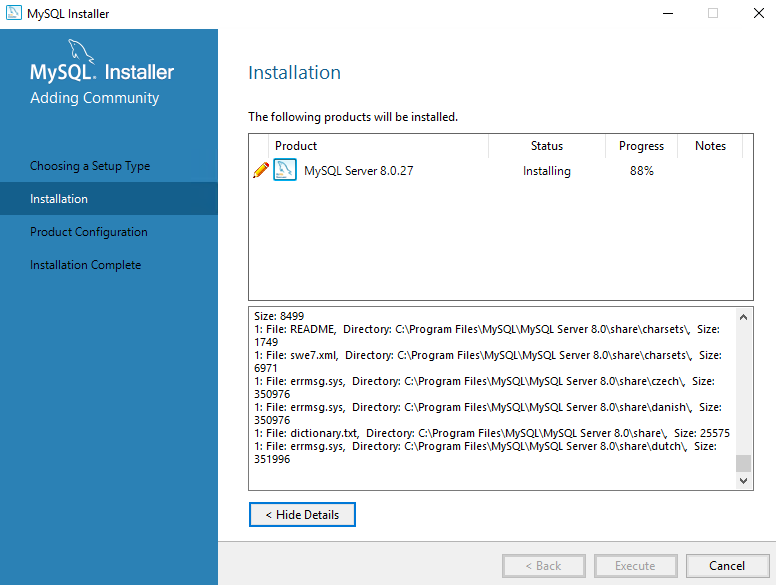
Install the server instance (and products) and then begin the server configuration by following the onscreen instructions.
Start installation
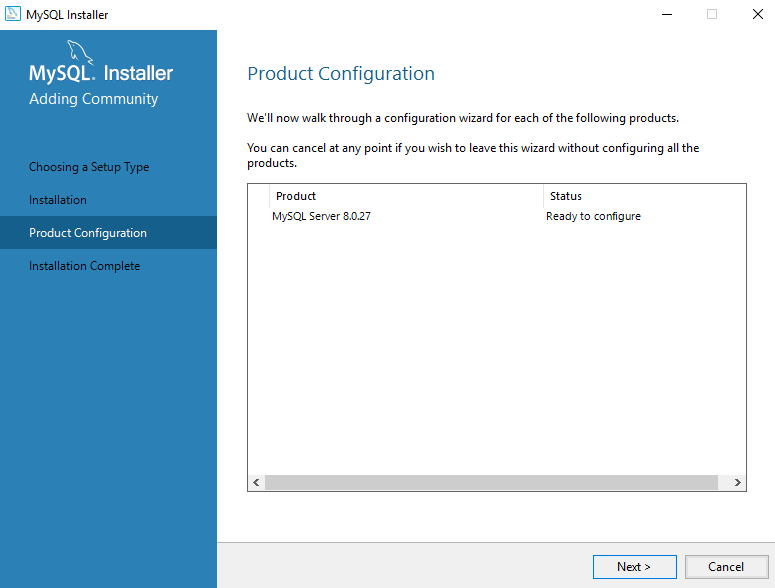
Begin product configuration
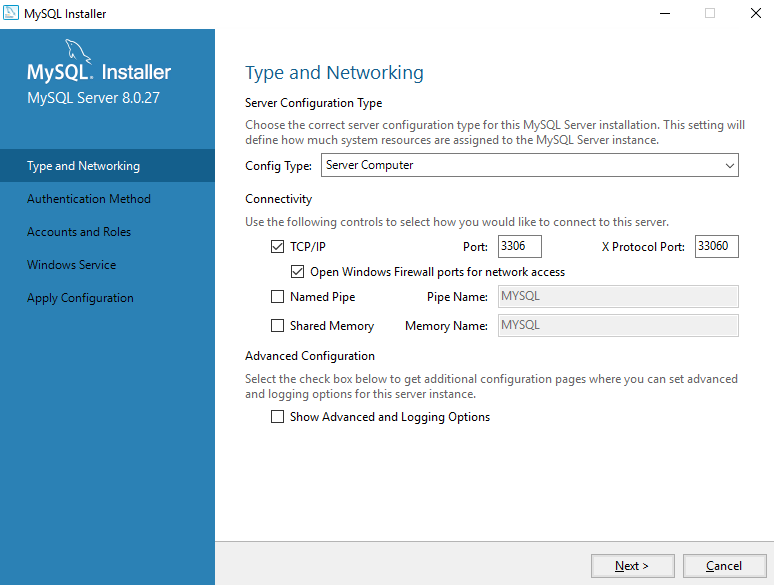
Type and Networking
MySQL server configuration type options defines the amount of system resources (memory) to assign to your MySQL server instance. Choose
Serverif several other applications are expected to run on this computer, such as a web server. ChooseDedicatedif server only running MySQL database.By default, TCP/IP option is selected with MySQL connection port value is 3306. If a port number is in use already, you will see the information icon () next to the default value and you can’t continue server configuration until you provide a new port number.
Advanced Configuration
Check
Show Advanced and Logging Optionsto set custom logging and advanced options in later steps. The Logging Options step enables you to define custom file paths for the error log, general log, slow query log (including the configuration of seconds it requires to execute a query), and the binary log. The Advanced Options step enables you to set the unique server ID required when binary logging is enabled in a replication topology.
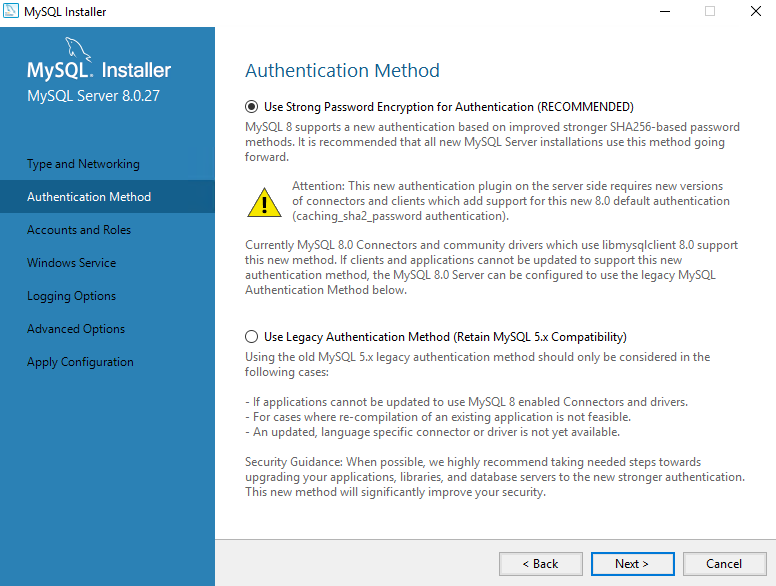
Authentication Method
The Authentication Method step is visible only during the installation or upgrade of MySQL 8.0.4 or higher. It introduces a choice between two server-side authentication options. The MySQL user accounts that you create in the next step will use the authentication method that you select in this step.
Accounts and Roles
Assigning a root password is required and you will be asked for it when performing other MySQL Installer operations. Password strength is evaluated when you repeat the password in the box provided. For descriptive information regarding password requirements or status, move your mouse pointer over the information icon when it appears.
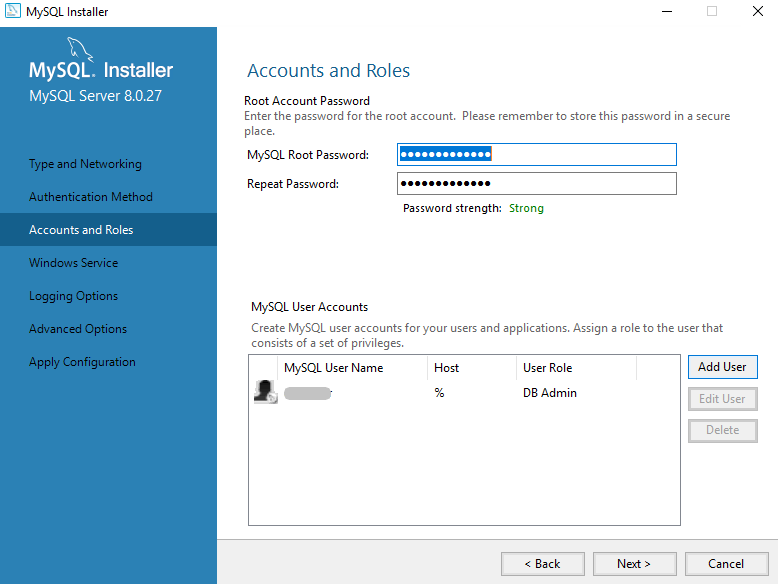
Click
Add UserorEdit Userto create or modify MySQL user accounts with predefined roles. Next, enter the required account credentials.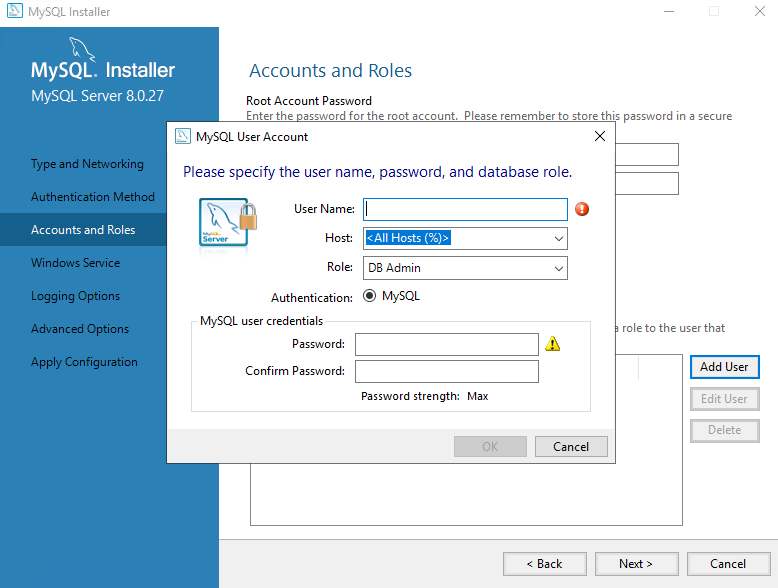
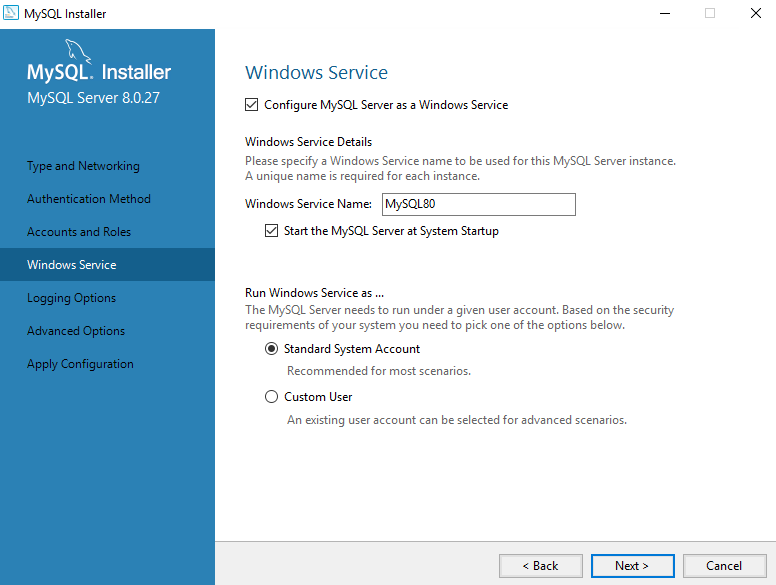
Windows Service
By default, Conimage MySQL server as a Windows service is selected. Continue to next step.
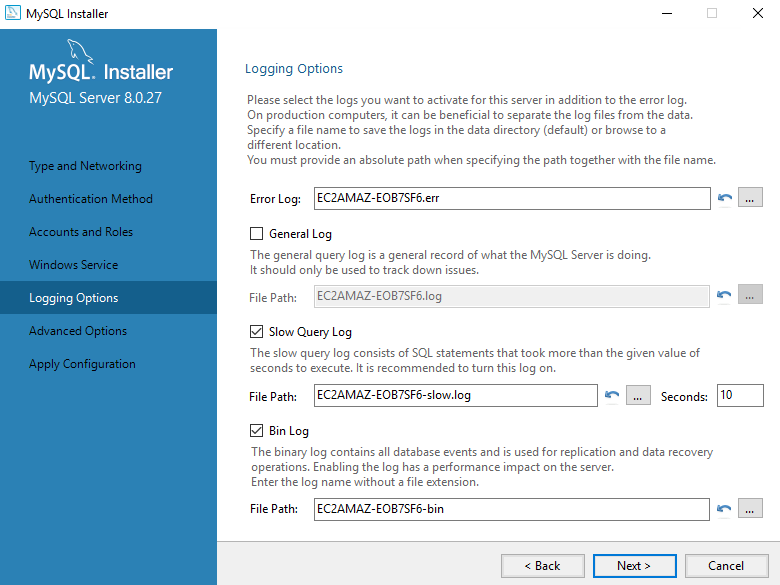
Logging Options
Advanced configuration options are related to the following MySQL log files:
Error Log,General Log,Slow Query Log,Bin Log
Advanced Options
The advanced-configuration options include:
Server IDandTable Names Case. Set the unique identifier used in a replication topology. If binary logging is enabled, you must specify a server ID. Set Server ID with number between 0 to 4294967295, or Leave it to default and clickNext.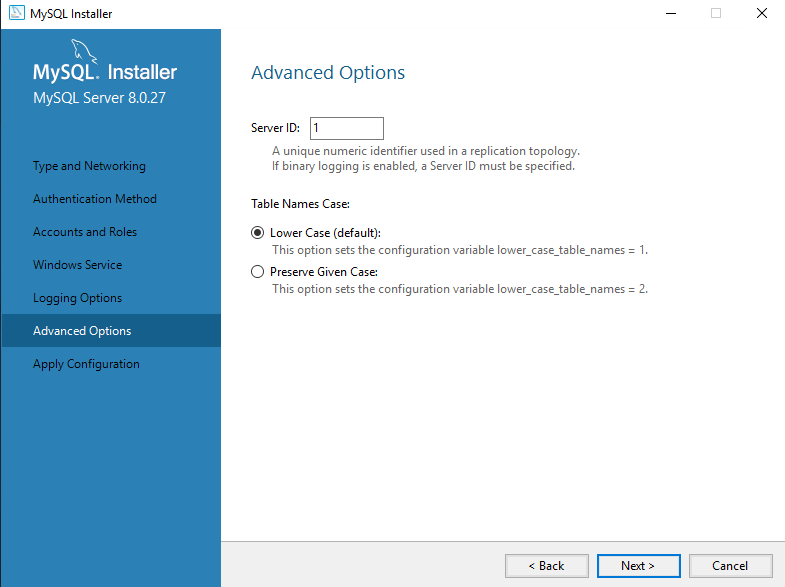
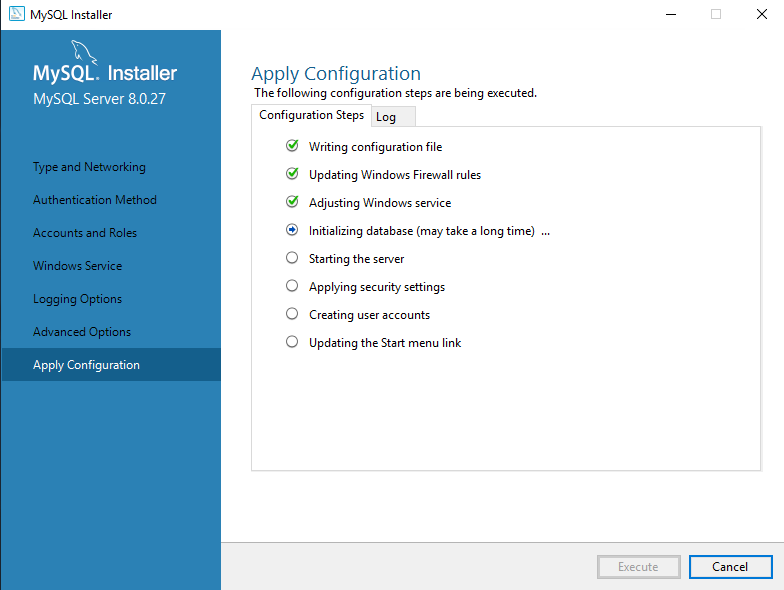
Apply Server Configuration
All configuration settings are applied to the MySQL server when you click Execute. Use the Configuration Steps tab to follow the progress of each action; the icon for each toggles from white to green (with a check mark) on success. Otherwise, the process stops and displays an error message if an individual action times out. Click the Log tab to view the log.
When the installation completes successfully and you click Finish, MySQL Installer and the installed MySQL products are added to the Microsoft Windows Start menu under the MySQL group
MySQL on Windows Considerations
Large Table Support
If you need tables with a size larger than 4GB, install MySQL on an NTFS or newer file system. Do not forget to use MAX_ROWS and AVG_ROW_LENGTH when you create tables.
MySQL and Virus Checking Software
Virus-scanning software such as Norton/Symantec Anti-Virus on directories containing MySQL data and temporary tables can cause issues, both in terms of the performance of MySQL and the virus-scanning software misidentifying the contents of the files as containing spam. This is due to the fingerprinting mechanism used by the virus-scanning software, and the way in which MySQL rapidly updates different files, which may be identified as a potential security risk.
After installing MySQL Server, it is recommended that you disable virus scanning on the main directory (datadir) used to store your MySQL table data. There is usually a system built into the virus-scanning software to enable specific directories to be ignored.
In addition, by default, MySQL creates temporary files in the standard Windows temporary directory. To prevent the temporary files also being scanned, configure a separate temporary directory for MySQL temporary files and add this directory to the virus scanning exclusion list. To do this, add a configuration option for the tmpdir parameter to your my.ini configuration file.